EN



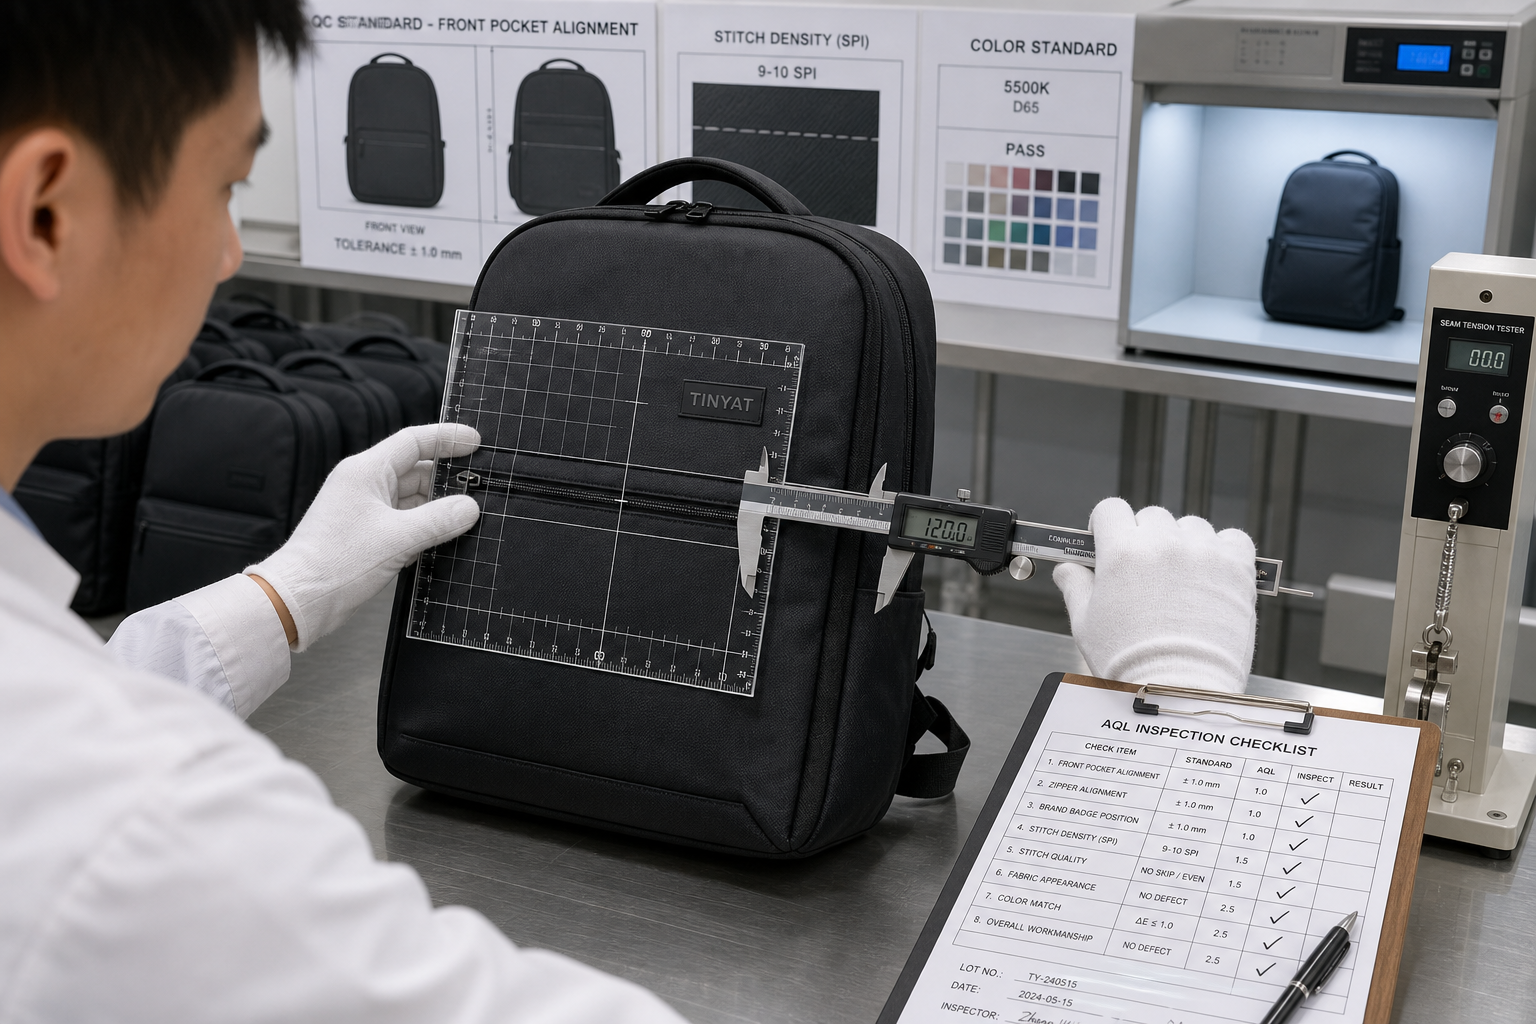
A container of 12,000 laptop backpacks reaches your warehouse and 340 units come back as returns in the first quarter. That math is the reason inspection happens before goods leave the factory, not after. Most bulk rejections we handle are not dramatic failures. They are a 3 mm logo drift, a loose bartack on a shoulder anchor, a carton that crushes two layers down. None of that shows in a hero photo shot at arm's length. What follows is the zone-by-zone checklist our QC team walks on every bulk run.
Fabric, Cutting, and Panel Symmetry
Start at the cutting table, because panel errors cannot be corrected later in the line. Open at least 10 folded units from a carton group and lay two panels of the same type side by side. Shade variation across dye lots is the complaint we receive most often and the hardest to resolve, since a panel cut from a second roll is already sewn into the body by the time anyone notices.
Check warp direction. A back panel cut across the warp instead of along it will stretch differently from the front panel, and the bag will hang crooked after six months of use even though it looks correct on the table.
At Tianqin, we hold panel cutting tolerance to plus or minus 2 mm and we print the warp direction on the cutting ticket, not only on the roll label. The ticket matters when a substitute operator takes over a shift and has 30 seconds to read the spec.
The first question most buyers ask us is how much shade variation is acceptable. Our answer: a panel difference visible at one meter under daylight fails, which we treat as roughly a delta E of 1.0 in lab terms. Anything wider needs written approval before cutting begins, because that approval protects both sides at final inspection.
Cutting defects that survive assembly
Skipped layers, tilted notches, and frayed edges all look minor at the cut and become structural at final inspection, so they are cheaper to catch in the first 200 units than in carton 400.
Stitching: Where Most Claims Come From
About 6 in 10 quality claims we process trace back to stitching rather than to material. The usual suspects are skipped stitches, an unbalanced stitch where the bobbin thread pulls to the top surface, and bartacks set too short for the load they carry.
Count stitch density on the main seams. We spec 8 to 10 stitches per inch on structural seams and 10 to 12 on webbing attachments. A seam running at 6 stitches per inch on a shoulder joint is not a cosmetic detail, it is a load path that will open.
Run a manual pull test on three units per carton. Grip the seam on both sides and pull firmly. A balanced lockstitch will not open. If the thread parts before the fabric does, the tension was wrong or the wrong thread size was loaded on the machine.
One point buyers rarely check: thread ends. On a line running at full speed, a factory will leave 15 to 20 mm tails inside the bag when nobody trims. That is a 2-second fix per bag in Quanzhou and a customer complaint at retail.
Zippers, Hardware, and Load Points
Run every zipper the full length three times. Look for skipped teeth, a slider that binds at the curve, and reverse-tape stitching that misses the tape edge.
Tension matters more than brand. Even with YKK zippers specified in the bill of materials, a loose tape tension setting will make the tape ripple along the curve, and the ripple reads as a wavy zipper line on the finished bag. We set tension on a test piece before every new color run, and it costs 10 minutes per run.
Check hardware under load, not by hand. The buckle must engage fully on the first push. The strap adjuster must not slip under 15 kg. The metal finish must show no pitting or plating bubbles. We use zinc alloy hardware as standard, and it runs about 30 g heavier per bag on a 25 L model than nylon hardware. That extra weight is a trade-off some buyers decline when they are chasing a low retail price point.
Foam, Lining, and Logo Placement
Open the laptop compartment and measure the foam at the corners, not the center. We spec 8 mm EPE for the base model and 10 mm EVA for higher price bands. Foam reading 5 mm at the corner will not protect a 15.6-inch laptop in a one-meter drop.
Run a hand along the inside of the front pocket and check the lining for wrinkles at the compartment corners and raw edges where the pocket meets the body.
Logo placement is where a 200-unit brand order is most likely to be rejected. Measure logo height from the bottom edge of the front panel on 5 units per carton group and check left and right registration. If the approved position is 45 mm from the top of the panel, then 41 mm is a reject, not a rounding difference.
Your Zone-by-Zone Inspection Checklist
Print this and take it to the inspection. Every line is a pass or fail, no scoring.
Fabric: shade match across panels checked under daylight at one meter
Fabric: no oil spots, needle holes, or weaving defects larger than 2 mm
Cutting: panel dimension within 2 mm of the spec card
Cutting: warp direction consistent with the tech pack on every major panel
Stitching: 8 to 10 stitches per inch on structural seams
Stitching: no skipped stitch and no open seam on a manual pull test
Stitching: all thread tails trimmed below 5 mm
Zippers: three full open and close cycles with no binding at the curve
Zippers: tape flat along curves, no rippling or puckering
Hardware: buckle engages on first push, adjuster holds 15 kg without slipping
Hardware: no pitting, sharp edge, or plating bubble on metal parts
Foam: laptop compartment foam meets spec thickness at all four corners
Lining: no wrinkle at compartment corners, no raw edge at pocket openings
Logo: placement height within 2 mm of the approved position
Logo: embroidery or print color and stitch count match the approved sample
Packing: polybag size, hangtag position, and insert present on each unit
Packing: carton gross weight within 5 percent of the stated value
Packing: drop one carton from 800 mm on a corner, no collapse, no content damage
Carton: shipping marks, barcode scan, and country of origin label present
Carton: moisture content below 12 percent for humid destination routes
Before You Approve the Order
Pull your inspection sample from the first hour of production, not from the pre-production sample. The first hour is when the line is still finding its settings, so it exposes more than a finished carton will.
Then agree in writing on what happens to failed units. Do not accept a verbal promise to sort later. Either the factory reworks on site before packing, or the units come out of the carton count. Both routes are workable, and a vague agreement is not.
Book the inspection against the packing date instead of the ship date. A third-party inspector usually needs 2 to 3 working days of notice, and factories often finish packing earlier than declared when line capacity opens up.
At Tianqin, every bulk order ships with a photo set per carton group, a packing list carrying carton dimensions and weights, and a signed inspection report. We also retain the approved counter sample for 6 months so that any dispute has a physical reference instead of a memory.
If you want to see how this checklist maps onto your own tech pack, send the spec to [email protected]. We can return a sample in 7 to 15 business days and quote the bulk program alongside it. The checklist above is the same one our Quanzhou QC team signs, and product and capability details are on www.tianqinbag.com.


 Hot News